


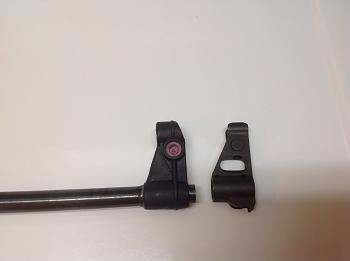
So I bought this Kel-Tec SU16A model and want to replace the cheap plastic front sight. After researching I found the closest iron sight is from an AK 47. Thanks to snail mail, my part arrived today. Here is the part compared to the factory plastic one. I'll update as I progress with the project.


 Reply With Quote


